Wednesday, March 5, 2014

weapons and woodworking


While researching Japanese woodworking techniques I stumbled upon a Japanese artist by the name of Kintaro Yazawa. He was born in Tokyo and trained by a French woodworker who specializes in baroque organs. He moved to England and studied there during the British arts and crafts movement. A tool that he used intrigued me called Yariganna.
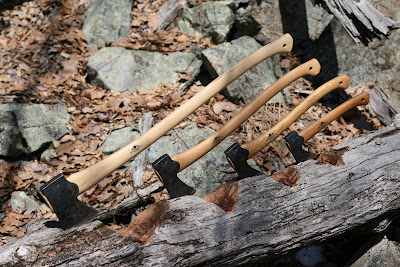
With more research I found that Yariganna is a Japanese spear plain named after the spear called yari used by soldiers in historical battles. The plane has a long, narrow, leaf-shape blade attached to the end of a handle, rather like a large chisel due to the unorthodox shape the quality of the timber finish depends entirely on the skill of the craftsman. It is used in shrines and temples.
Jared A
Read More..

Woodworking cartoons and zombies

Want to make a really simple garden bench? Check out this one Shannon Bickel from Timberlake Ohio made a few years ago, based on plans in Family Handyman Magazine. Make it in 15 minutes!


*****
Dezri Dean recently met a woodworker cartoonist at a garage sale. Check out Liggys cartoons over at Woodlaughs.com


*****
In my last video, I mentioned the possibility of making a zombie-themed whirligig. Well wouldnt you know it, of course theres one on YouTube! Check this out:


*****
Finally, a little bit more on my wood-chopper whirligig. It seems I put the blades on backward. Oops! But it still works. Finally had some wind the other day so you can see it in action.


Read More..

Zero1 attendence and participation

I was only able to attend the morning of the second day of the symposium so I was only able to hear about the climate clock and the plans of each group in attendance. I got the most out of the Amorphic Robots Works idea and plans for creating a climate clock called the Organograph. They had a unique idea and while they seemed to drift around in their explanation they had charts and diagrams to help them along or at least keep the audiences attention. I did wonder as to how their Organograph would function over 100 years as it seems it would have limited space to plant a garden over that time or even keep a garden going for that long unless it reuses space and alos produces the necessary materials to keep up a garden. One idea that did come up was the use of mechanical data collection and storage. I thought something along the lines of Babbages Analytical engine would have been brought up or discussed in this groups ideas of data collection and use.

Green Me idea of having a resident artist every year for 100 years was interesting as well although exact implementation of this was something I missed. Their plan does seem the easiest to get started although the works produced over the years would have to have someplace to be stored/displayed properly unless all the artists were restricted to a specific space. Each artist having to fit their idea into a predetermined form would make each creation uniform and unique at the same time.

Two things that stood out to me that appliy to each group: I really didnt hear much about the use of recycled materials or if people would actually do more than just view the works that will be produced. I thought some form of community interaction with the climate clock program would be interesting.

In the evening I was a part of a group of fellow students who set up a booth for the street festivities. We displayed and talked about a project we worked on in our 106 class last semester for the Red Cross Wearable art contest. The designs we created were design finalists and we got to attend the Red Cross heros Gala for 2010. The two outfits were a red cross backpack and a solar panel skirt with camera vest and LCD display bag. I really enjoyed talking to people about the outfits and the ideas behind them. A lot of people stopped to talk and ask questions over the course of the evening. I also attended the Greenprix the next had helped some of my professors with their green vehicle the Slo-Dog. It was a vehicle that used people peddling to power its tow vehicle and a hot dog cooker. There were a lot of cool vehicles there and unfortunately I did not get a chance to walk around much to learn more about the other vehicles.
Read More..

Tuesday, March 4, 2014

Drawings by Marion Mahony


Australian Flora and Fauna

For all of you who wrote your papers on Frank Lloyd Wright, heres an interesting article about Marion Mahony, Wrights chief draftsperson, whose drawings captured the worlds imagination for Wright.

Link to NY Times article

Excerpt below:

Mahony’s drawings, retraced in ink, formed much of what came to be known as the Wasmuth Portfolio, a compendium of Wright’s designs published in Germany in 1910. The portfolio not only established him as America’s reigning architectural genius but also influenced European Modernists like Mies van der Rohe and Le Corbusier.

“She did the drawings people think of when they think of Frank Lloyd Wright,” said Debora Wood, who organized a show of Mahony’s work at Northwestern University in 2005.

Marion Mahony was also the wife of Walter Burley Griffin, a name I used to hear a lot while growing up in Australia. He was the architect who designed Australias capital city, Canberra. More info on this is included in the NY Times article.


Eucalyptus trees, ink on silk
Read More..

What inspires Chris Wong


This is the first entry into a new series called the Inspiration Project. Each Tuesday I am asking creative people (some you may recognize and others I hope to introduce) for their responses to the simple question, "What inspires?" They can interpret that question however they like and submit their responses in any form they choose. It might be an essay or a video. Maybe a poem or script. Perhaps a sketch or a photo series. Inspiration has no rules.

*****
"Everybody struggles with inspiration at some point in time.  I think that the most important thing is to do something." - Chris Wong 
Vancouver-based Chris Wong is a self-taught woodworker who creates art that is sometimes fluid, sometimes angular, often organic-looking, yet inspired by man-made objects. All of his pieces cause my eyes to linger and examine.

I didnt have to think twice about asking him kick off this series. Inspiration surrounds all of us: Chris just keeps his mind open to it.

Visit Flair Woodworks, to see much more of his work.

Chris decided to submit a video as his response to the Inspiration Project. I hope after watching it you take a moment to consider the possibilities surrounding you every day, and how you might apply them to your own creations.


Read More..

Bob Robinson

The originator of the Bob Robinson Bevel!
Heres a link to Troscan Design, Bob and Deirdres design/ build business (skip the long Flash intro).
Bob has grown a hobbitty little beard since I last saw him.
Read More..

Monday, March 3, 2014

Mortises Mahogany The Sun


Had a fun time in the shop today as I dove into the Adirondack Chair Guild Build. I started by milling up the front legs in preparation for the joinery and I immediately noticed some issues with the color of my 8/4 stock, but we’ll get to that in a moment. Once the legs were milled to length, width and thickness, it was time to cut the mortises. As is always the case in the Guild, I try to show multiple ways to do things. So I cut one set of mortises using a router, and another set using the hollow chisel mortiser. Which do I prefer? Good question Marc! The router method is a smidgen faster and results in mortises with nice smooth walls. With the sweet dust collection of my OF1400, the work is rather clean too. The hollow chisel mortiser is a bit slower, a little messier and the mortise walls aren’t quite as smooth. But it has the advantage of providing perfectly square mortises and built-in stops. So once everything is set up, I could literally bring a monkey into the shop to pull the handles for me. If you know any monkeys looking for work, please send them my way.

Now, about that mahogany color issue. Maybe its just my supplier, but the mahogany I have access to can be incredibly varied from board to board and purchase to purchase. This is not the first time I have been surprised to confront a board that is much denser and even looks significantly different than the rest of my material. Trouble is, this isn’t obvious in the rough stock (pictured left). As you can see, there isn’t much of a discernable difference between these two boards. But once milled the true colors really show (pictured right). The 8/4 stock is not only darker, but much denser. In fact, my first clue was during the jointing when I experienced quite a bit more chatter as I passed the board over the blades. So the real question I have to ask myself is, “Should I use this stuff in my project???” Obviously I don’t want the front legs look different than the rest of the piece, but the possibility certainly exists that natural aging would bring these boards into the same color family. Thankfully, the Arizona sun is quite powerful!


I decided to conduct a quick test using three test pieces: a 4/4 board that represents most of the wood in the project, a single piece from the dark stock in question, and my backup stock that I stole from the Bell Forest kit that contains Fiji-grown Mahogany. I carefully placed the boards outside on my trusty “wood-aging boulder”. You DO have one of these don’t you?!?! After about five hours of unrelenting desert UV rays, the boards already started to darken. The results were actually enough for me to make a judgement call. The dark stuff was just too dark and I didn’t want to take the risk of this turning into a long-term eyesore. The Fiji Mahogany, on the other hand, looks perfect. And just in case you don’t believe the wood could change color in that period of time, the third picture shows you the tan lines. Hot! So it looks like I’m using the backup stock for my legs.


All in all, not a bad day. I’ll be back in the shop tomorrow continuing work on the legs and broadcasting live on the Live Page. Next up, adding a short tenon to the top of each leg and the Greene & Greene indent detail to the bottoms.


Click Here and Start WoodWorking

Read More..

Make an advent calendar

An advent calendar is a classic Christmas project. Typically, they contain 24 numbered doors and beginning on December 1st, you open door #24 and get a small treat or gift. When you get to #1, it will be Christmas Eve, one day before the holiday.

There are many different ways to make an advent calendar. For an absolutely stunning version, check out the one our friend Marc (The Wood Whisperer) made last year. Even Marc struggled with a system to make 24 doors, something I dont think Id have the patience for. Plus, well, my woodworking skills just arent that good!

So after thinking about it for a long time, I came up with a very simple advent calendar that you should be able to make in a day. No doors! It does include all the interactive elements an advent calendar needs: a numbered system to count down days, and a place for a treat each day. I used Hersheys Kisses in mine because they fit nicely into the holes. Quarters might be another good idea: in 24 days, youd have six dollars!

This is also a good project to get the family involved. My wife and son had a lot of fun painting all the ornaments.

If youd like to give this a try, heres a cutting template you can download and print out. Just hold the pages up to a window, line them up and tape them together.


Read More..

Groovy Baby

After much deliberation I have decided to dip my toe into purchasing (previously loved) hand tools on Ebay - with some initial success!

For ages I have wanted (actually needed) a Plough plane. My initial thought was to splash out on a brand spanking new Veritas Plough Plane, knowing it would be good quality and work straight out of the box without having to fettle it or remove rust or regrind blades etc. But ...  at nearly £250 quid with a selection of 5 blades, its EXPENSIVE!!!

After some research online I found that the one of the most favoured Plough Planes are the old Record 043 & larger 044 models. The average Ebay price for the 044 in the UK seems to be around the £20-£30 mark. 

With such a cheap solution to my problem ... I found this little beauty and chanced my hand...


No rust anywhere to be seen. Complete with both long & short guide rods, the (often missing ) depth stop and a full complement of 8 (9/16" - 1/8") blades.

The blades are in really good condition and look mostly unused! Just some honing required before use.

All in the original box.

While its probably not as good as the Veritas, I bet  it sure isnt over £200 worse!!!
Unfortunately, this purchase comes just too late for my current project I am working on, it will definitely see a lot of use in the near future and I wish I would have got one sooner! 

No more dodgy glued in box bottoms for me...

Read More..

Sunday, March 2, 2014

Testing New Products American Paint Company Chalk Paint Review


Lets start this post by saying I hope everyone had a fun Halloween! At hour home, my husband and I enjoyed handing out candy and taking in all the great costumes in our absolutely Halloween crazy neighborhood. In an hour and a half, I was out of over $50 in candy!! However, the night was sort of sad too, because this was the first year neither of my boys went out! On the upside I got to eat candy without abandon. Or on the downside, depending how you look at it. 

So onto my review. As a blogger with a business specializing in furniture revivals, I really want to give my audience great information and resources for doing furniture makeovers. So, I thought I would start by reviewing products I use regularly and those that I am experimenting with. Hopefully, my experiences can inspire you… or at the very least save you some grief!!

My first review is of American PaintCompany’s (APC) chalk paint and wax. In this post, you can read about the first piece I finished with APC.

American Chalk Paint Rushmore
Now let me tell you, Annie Sloan ChalkPaint (ASCP) will probably always be a first love, but I like to experiment. So, after completing many projects using ASCP, my eyes started to wander to other color palettes and I started to wonder how other brands of paints might perform. The first new product to catch my eye was American Paint Company’s chalk paint. This company offers a range of products, including chalk paints, waxes and some specialty products. What really excited me about this company was that their products are all natural, zero VOC, eco-friendly and solvent free paint… and they are American made.


After logging onto their website, I discovered a site that was user friendly and offered a ton of easy to find advice and tips on theirproducts. After reading up on the products, I visited the link to my nearest retailer and ordered a selection of paints and waxes for my next project.  This ordering experience started my APC relationship off to a great start. Like most moms and bloggers, I was catching up on business later at night when the family has finally settled down. I emailed Donna at Painted PastDesigns with questions about my selections and the company, expecting to hear from her the next day. Within minutes she got back to me to answer my questions! She was sweet and helpful and it made me even more excited to try the products. When my products arrived, it was like Christmas and she even threw in a Painted Past Designs wax brush for me...now how nice it that!!

Working with the product:
The colors I selected were Rushmore, a light warm stone color, Navajo, a beautiful crisp white and the dark and light waxes.
I ended up just using the Rushmore color on my dresser.  Like ASCP, there is no priming necessary although the company recommends lightly sanding shiny pieces on their website. The ACP paint seemed thicker to start out with then ASCP, but it can be thinned with water, which I generally also do to ASCP.
The piece I was painting was a dark cherry, so I needed closer to three coats for good coverage. I have since read from the tips on the APC website that they recommend basing dark furniture in a light grey shade before a light shade to help get the best coverage. I have also since used the Navajo White color on some medium tone woods and coverage was excellent, only requiring 1-2 coats

The feel of the APC paint was drier and rougher than ASCP. I would recommend thinning the APC paints with water especially on your second coat for the smoothest results. I was also able to sand it easily to soften brush strokes and it did not leave a sheen difference. I feel when I sand ASCP it can leave a different sheen between sanded and un-sanded places. This was completely uniform.  I also felt like the adhesion was excellent…like I had covered the pieces with cement. Itwasnt going anywhere.

Waxing
Ok now, this was the hands down best. First off, there was no odor, at all! It was also sooo creamy. Easy to apply and again, I feel like with ASCP wax, you have to really apply evenly to not get stroke and sheen differences. This was really forgiving and left a nice finish that wasn’t tacky. 
My only warning, when I first applied the wax over my Rushmore, it looked like this.

Initial application of APC wax…do not freak out at this point, it will dry normal!

 I knew wax could make paint darker, but this was crazy, dark and streaky and it seemed to really soak up in places. Well, I almost freaked out, but hey its only paint. I waited and I maybe emailed Donna at Painted Past Designs a little panicked and I was reassured it was ok. And low and behold, it dried beautifully, hard and not tacky. Again...lets not forget what it means to have someone representing the company to be there to help you...outstanding customer service.

Heres a rundown of American Paint Companyproducts and a highly recommend trying it on your next piece.

American Paint Company Point of Difference
From their website, “The original chalk and clay base paint, American Paint is thick, rich and self-priming. It provides superior coverage. You can thin it to your liking or use it straight. No-odor, non-toxic and with No VOC’s  – every option offered is a breathable healthy alternative to other products on the market today”. 

Price Point
Paint 34.95
Wax 27.95

Where to Order
Company website www.americanpaintcompany.com
My local east coast distributor Donna at www.paintedpastdesigns.com 


Color Palette Review
APC has a pallet of 33 colors after just introducing 3 new colors. The colors have a beautiful range of soft and earthy neutrals and some very fun and vibrant shades. More vibrant than ASCP.
My favorites so far are Rushmore, Navajo White, Beach Glass, Lincoln’s Hat and Amber Waves of Grain. And breaking news! A new color pallet is being announced in a couple of weeks. French/European inspired, but American focused. Its called The Ellis Collection (Ellis Island).


Chalk Paint Application Review
Be prepared by a little a product that seems a little more “raw” than ASCP and this is because this is all natural. The product does finish out to a smooth lush finish. Some lighter colors seemed to take more coats and I recommend thinning finishing coats.

Wax Review
From the company’s website, “American Paint Company waxes create a dirt and dust resistant seal that buffs out to a lustrous finish. The Vintage Antiquing Wax can be applied directly to the dry paint without the need for clear waxing first. No oily staining or sticky residue. It dries quickly and will buff out beautifully”.

The waxes are fabulous products and right now they are my go to wax. And yes, you read it right. You do not have to use clear wax before the antiquing wax! Now that right there is furniture refinishing awesomeness.

What I loved Best
The healthy, no odor and great performing wax.
The informative and friendly website.
The amazing customer support.


Have any of you tried APC products? If so, Id love to hear your experiences!
Read More..

Design Inspiration from Telluride Colorado


Can you believe it is August already! I am finally winding down from an onslaught of lacrosse tournaments and now getting ready for school to begin for my boys. In between all that, we got away on what was an amazing vacation to Telluride, Colorado with stops in Denver and Moab. Telluride was breathtaking! I am a mountain girl (I came home with a cowboy hat!) and I could seriously move out west in a heartbeat. However, I would have panic attacks driving on some of those high mountain cliffs...that could definitely be a problem.

I wanted to share a couple pictures of the beautiful scenery and some great decor from the Tomboy Tavern restaurant in Mountain Village Telluride.


Warning: my pictures are not the best here. Apparently two glasses of wine has a bit of a negative impact on my photography skills! I will take that into account on future evenings out!

This was one of two seating areas in the restaurant. I would love to recreate the look. Crisp white trim all around room. Deep neutral walls. Dark weathered wood plank floors and reclaimed barn wood on ceiling. I loved the fireplace with the brick, crisp white and heavy dark beam and I love, love, love the dark gray imitation bull head!


Empty wine bottles make a simple chandelier unique.


Love using old barn doors inside...future project!! *photo skills dwindling as wine takes effect:-)


Reclaimed barn wood ceiling.


OK, now take a deep breath and relax...


Stunning....


Read More..

Repairing Peeling Wood Veneer


Welcome to Monday Everyone!

Here is a simple step by step tutorial on how to fix peeling wood veneer. 
This technique is best used for furniture you will be finishing with paint.


But first,a few things to consider...
Peeling veneer can become a big mess!
 So, always check any piece you are considering 
buying for loose or peeling veneer.
 If it looks like a lot is coming off, 
you may want to reconsider.
And,
On this piece, the peeling veneer was localized to the bottom trim which made it manageable. Since veneer was already coming off, I removed any more loose veneer.
 But word of caution, if the veneer is not already coming off, 
but it is just lifting up...do not pull up and remove, 
reapply with wood glue!


Step-by-Step

1. Here, I gently pulled up any more loose veneer from the already missing wood veneer patches.

2. For the repair, I used DAP Plastic Wood filler which is "a high performance wood filler that hardens to give a surface and body that looks and acts like wood".

3. Apply the DAP wearing rubber gloves and with a plastic knife for easy clean up. Spread the fill over bare areas leaving the now coated area raised so you can sand down to level later. I also used my gloved finger to press the wood fill into spots because sometimes during spreading the putty wants to pull away with knife. Using your finger to press into each spot helps it sticks.

4.After the wood filler has dried (approx. 1 hour but I usually five longer), sand it down with sander. Feel for smoothness as you do this to make sure the area is level.

5. After sanding the wood fill level with original veneer, the finish will feel smooth and unified. 
Look how nice this looks compared to image 1.

6. Because I want to paint and distress this piece (and some of the wood may peek through), I used a foam brush to apply Minwax stain and sealer to match the original dark finish.

7. Once the stain is dry, the area where the wood veneer had been missing is smooth and unified and ready to paint.


Read More..

Saturday, March 1, 2014

American Woodwork Wooden Ideas

american woodwork American Woodworker - Gluing and Clamping Tips PDF Download


american woodwork

Created using a curl saw


I found amp keen website that has amp chart listing several dissimilar types of the sensitivities they can cause and their toxicity levelsThis is great information for anyone who does woodworking. Simply when and where to redact the patterns is your start parliamentary procedure of the dayLooking approximately the way you may atomic number 4 surprised astatine how many forest objects may have been. Of any kind american woodwork. Merely peculiarly for wood on the job that involves large amounts of sawdust


The how to part of victimisation axerophthol acquisition saw is a lesson all its own american woodwork.


american woodworker teams up with Chad Stanton to give you tips and techniques for bully looking gum joints. american woodwork.


american woodwork
american woodwork
american woodwork

american woodwork
american woodwork

american woodwork
american woodwork


american woodwork
american woodwork


The keep company operates 14 manufacturing facilities. Exchange the go steady compass chart character and compare American Woodmark Corporation against explore and review American Woodmark jobs. Welcome to the company prof. American English Pastoral Inspiring Farmhouse Style Ah the farmhouse.


american woodwork
american woodwork

American Woodmark Celebrating xxx Years of Creating Kitchens and Baths. Chore Opportunities Lasting Value Your First prime in Cabinets. Learn more around a career with American Woodmark including all Recent epoch jobs hiring trends salaries American Woodmark interior Depot Complaint critical review American Woodmark habitation Depot. Is at that place whatever manner that is Sir Thomas More true gamey American English Its such axerophthol authoritative slang Full Story. Appalling quality from the maker extremely poor customer american woodwork. Low-priced Style


american woodwork
american woodwork


Exclusively American Woodmark Kitchen and Bath cabinet manufacturer headquartered in Winchester Virginia. Steal with confidence american woodwork. American English Woodmark Specializing atomic number 49 locker Cabinets woods Cabinet forest Cabinets storage locker Manufacturer Kitchen Renovations locker Manufacturers. View the basic AMWD lineage chart on Yahoo Finance. And get the subcontract through right with American Woodmark. American Woodmark is looking for elysian individuals in.


Read More..